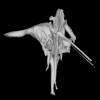
Holotype of Hamadasuchus rebouli
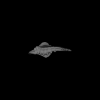
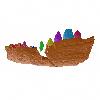
3D models of the endocranial anatomy of Voay robustus and comparative specimens
Inner ear morphology in wild vs laboratory mice
3D GM dataset of bird skeletal variation
Skeletal embryonic development in the catshark
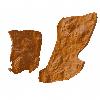
Bony connexions of the petrosal bone of extant hippos
bony labyrinth (11) , inner ear (10) , South America (8) , Eocene (8) , skull (7) , brain (6) , Oligocene (6)
Maëva Judith Orliac (17) , Lionel Hautier (17) , Bastien Mennecart (12) , Laurent Marivaux (11) , Pierre-Olivier Antoine (11) , Leonardo Kerber (10) , Renaud Lebrun (9)
Data storage has a cost and we want M3 to remain a free service. Keep in mind that M3 publishes primarily 3D surface models of specimens (.STL, .VTP, .VTK, .PLY...). Blender projects (.BLEND) are also accepted.
M3 also published image stacks produced via CT or MRI, but this remains an optionnal feature.
CT/MRI data are often very heavy, and you may think that a .zip file of 500 Mo is ridiculously small. However, there are a few ways to reduce the size of a large set of images while keeping a reasonably good level of image quality. You can try the following options :
The last three options (and especially the last one) will have an impact on image quality. It is up to you to decide which decrease in image quality you are ready to accept before sharing your data.
You may use the software ImageJ to crop your images.
If you are able to open your entire CT/MRI dataset with ImageJ, then simply make use of the "Crop" function, and save your resulting image stack in another location (draw a rectangle delimitating your region of interest, and then go to menu Image->Crop).
It may happen that a CT/MRI data set is too large to be entirely loaded in memory (for instance you may have synchrotron data). Here I present you a rather simple way to crop such large data without having to load the entire image stack in memory. As a first step, download the crop macro and place this file inside the "macro" directory of ImageJ.
|
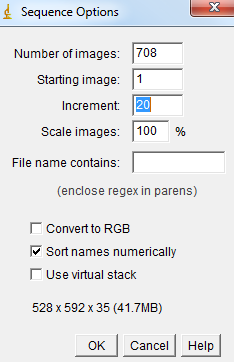
1) Open a part of your image sequence (for instance go in File->Import->Image sequence and chose to open only 1 image every 20 images by changing the Increment value, in order to reduce the amount of memory needed to open the stack by a factor of 20). |
 |
|
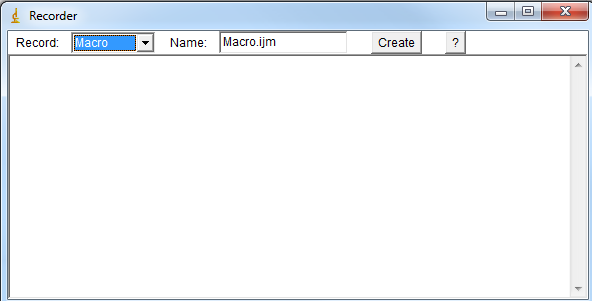
2) Open Macro recorder window (Plugin->Macros->Record) |
 |
|
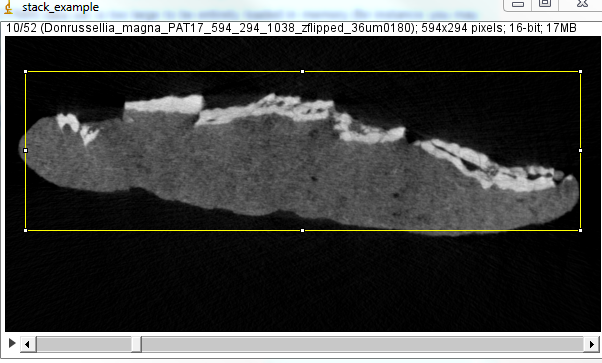
3) Define the ROI with the rectangle selection tool. Adjust the ROI in order to have your structures of interest enclosed in the rectangle for all slices. |
 |
|
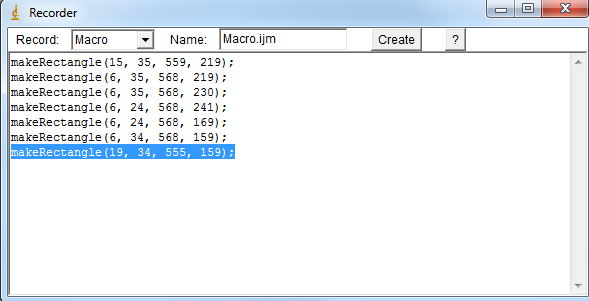
4) Copy the last "makeRectangle" command in the macro recorder window. |
 |
|
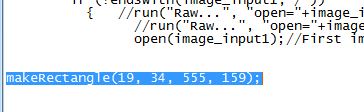
5) Open the _macro.txt file you have placed in your "macro" directory. Find the makeRectangle command and replace it by the one you have just copied from the Recorder window. Save the _crop.txt file. |
 |
|
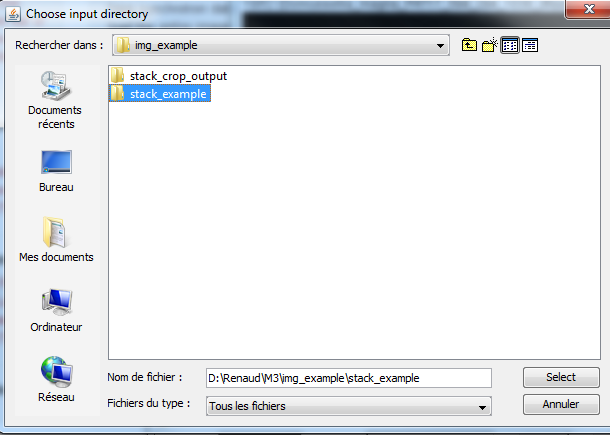
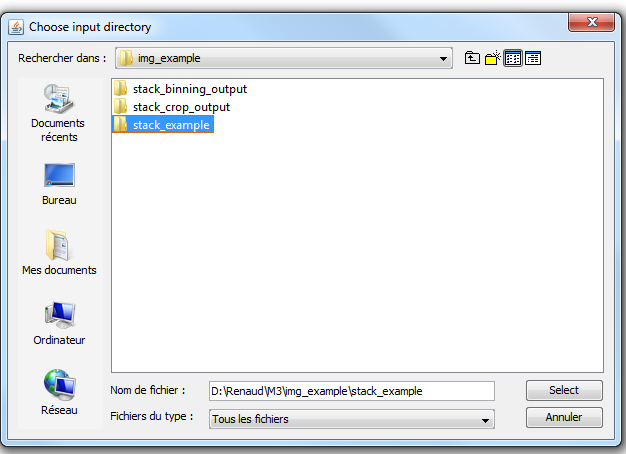
6) Launch the _crop.txt macro. To do so, first go in Plugins->Macros->Install and chose the _crop.txt file. Then go in Plugins->Macro->_crop. The following window should appear. Here you should chose an input directory in which you have stored your original CT/MRI data. Be aware that this directory should contain only images, and that these images should all have the same width and height. If these requirements are not fulfilled, the _crop.txt macro will not work. |
 |
|
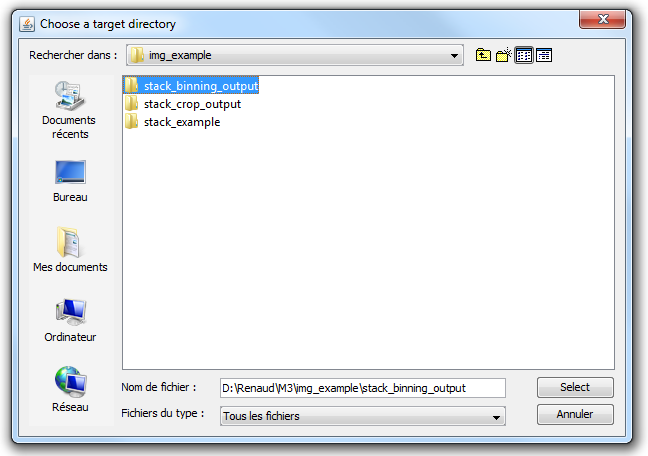
7) Chose an empty target directory. This will be the place where the new image stack will be stored. |
 |
You may use again ImageJ to transform your images.
To do so, you have to be able to open your entire CT/MRI dataset with ImageJ.
|
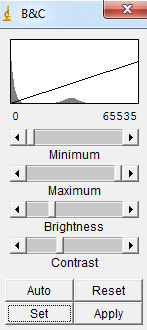
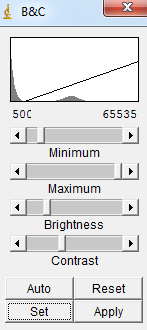
1) Open your whole image sequence (File->Import->Image sequence). Then go in Image->Adjug->Brightness/Contrast. If you use CT images, very often, you will see at least two peaks in the histogram. The leftmost peak usually corresponds mostly to that of "air", while the rightmost peak corresponds to that of the specimen. Then you may set the minimum value to a value greater than that of the peak of air. |
|
|
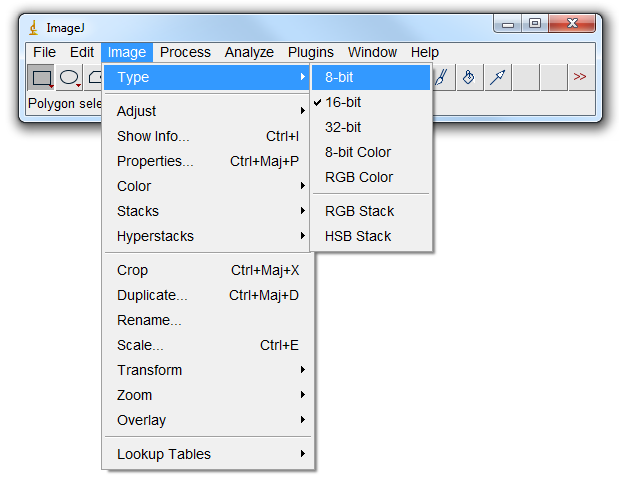
2) Then go in File->Image->Type and change the image type to 8bits. As a result all the voxels situated in a region containing air will have been given a value of 0. |
 |
|
3) Save your dataset (either as a .raw image or as an image stack), and compress it inside a .zip file. |
In this example, we managed to reduce the size of the CT dataset by a factor of more than 10. Be aware that following this strategy, you can achieve similar results without changing the image type and without risking to give a value of 0 to voxels belonging to a region of interest by creating macros for Photosop implicating the creation of "masks". The idea is to manage to select all the regions which are of no biological value (air or sediment matrix) and to give them a value of 0.
Again, you may use the software ImageJ to reduce the resolution of a CT/MRI dataset.
You can download the plugin at the following page.. Then close and restart ImageJ.
Download the binning macro and place this file inside the "macro" directory of ImageJ.
|
1) Launch the _binning.txt macro. To do so, first go in Plugins->Macros->Install and chose the _binning.txt file. Then go in Plugins->Macro->_binning. The following window should appear. Here you should chose an input directory in which you have stored your original CT/MRI data. Be aware that this directory should contain only images, and that these images should all have the same width and height. If these requirements are not fulfilled, the _binning.txt macro will not work. |
 |
|
2) Chose an empty target directory. This will be the place where the new image stack will be stored. The target directory will contain twice as less images as the input directory, and the width and height of the resulting images will have been divided by 2. The weight of the output directory should be 8 times smaller than that of the input directory. |
 |